Step 1: Create request to download Aspect CXP
Make sure to select the ‘15.1 GA Developer’ version (image below), then click ‘Download Now’;
Fill out the necessary contact information, then click ‘Send Request’. You should receive an email shortly afterwards with the download link.

Step 2: Install Aspect CXP
Step 3: Configure Aspect CXP
In Aspect CXP, select ‘Window’ → ‘Preferences’;
In the left-hand menu, click ‘Aspect CXP’;
- Create a new CXP connection:
...
f. Click 'OK' to exit preferences.
Step 4: Switch CXP host connection
From the main menu, click ‘Aspect CXP’ → ‘Switch Metadata Repository Connection’
If not selected already, select the newly-created connection and click ‘OK’
Step 5: Create a new ASPECT CXP project
Click ‘File’ → ‘New’ → ‘Aspect CXP Project’
- Create a ‘New Project’ (similar to what’s shown below), then click ‘Finish’.

Step 6: Import the
...
myARCH IVR application
From the left menu, click the newly-created CXP Project, then double-click the version number (e.g. ‘Version 1.0’);
Locate the mySCILHS myARCH IVR XML file (which will be provided);
Click ‘Aspect CXP’ → ‘Import’;
- Select the mySCILHS myARCH XML file from your filesystem and make sure the options are set as shown below, then click ‘Import’.
...
e. Once imported, you will see the newly imported objects appear in the Object Browser pane (SHOW SCREENSHOT HERE)
Step 7: Deploy application to cloud
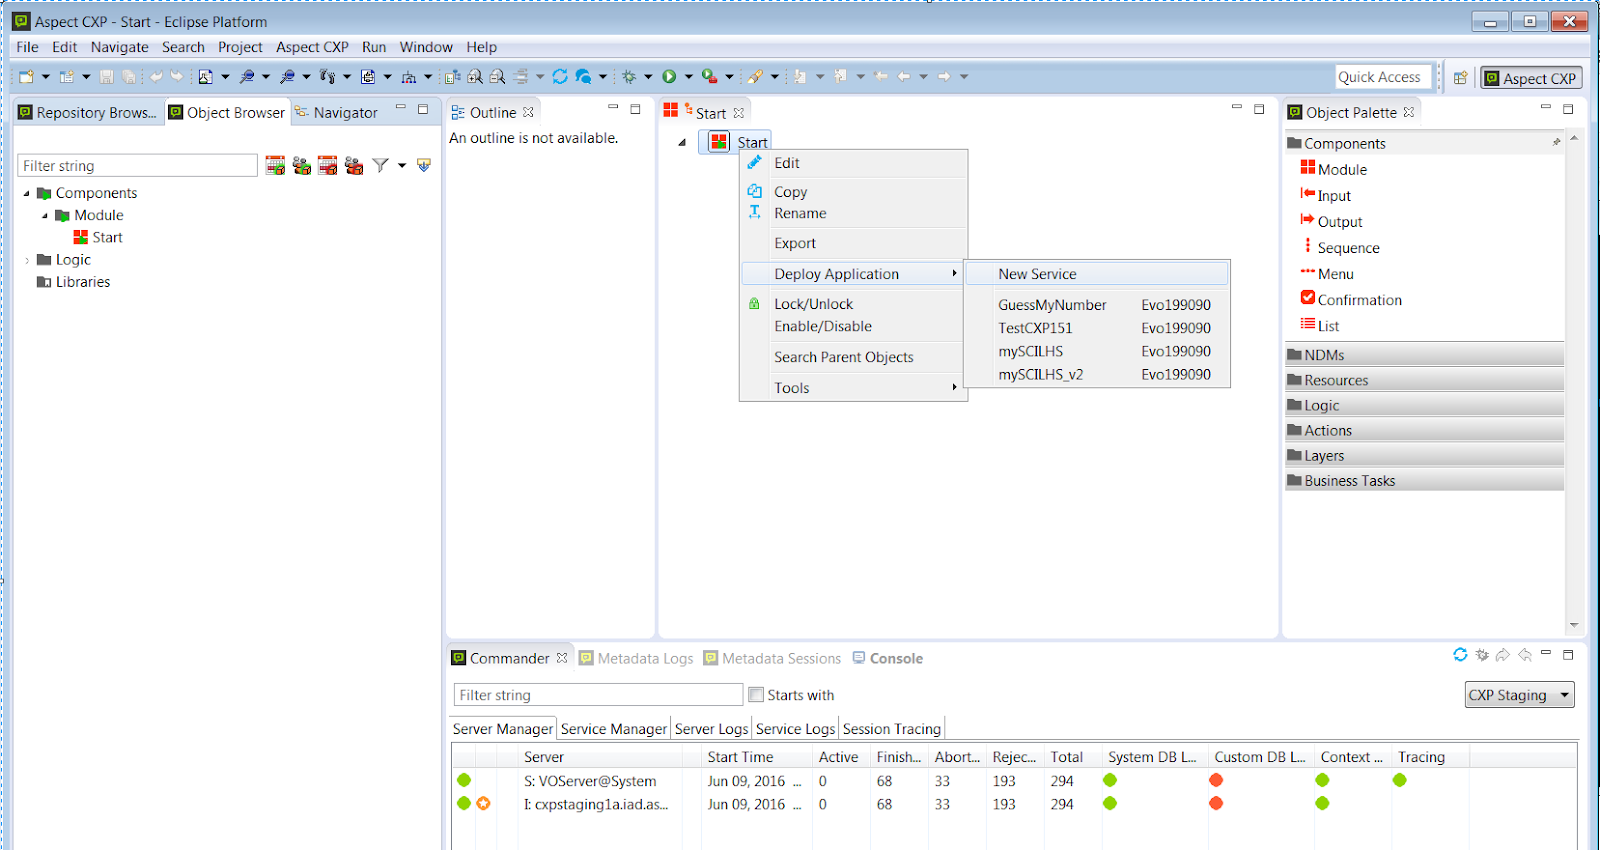
- In the Object Browser pane, right-click the ‘Start’ module, then click ‘Deploy Application’ → ‘New Service’ (image below);
- For the new Service name, enter ‘mySCILHS ‘myARCH IVR’ and click ‘Finish’. The application make take several moments to load.
...
Step 8: Migrate assigned phone number and token to new application
In a Web browser, go to https://evolution.voxeo.com and login with your supplied credentials;
From the drop-down menu, select ‘Account’ → ‘Application Manager’;
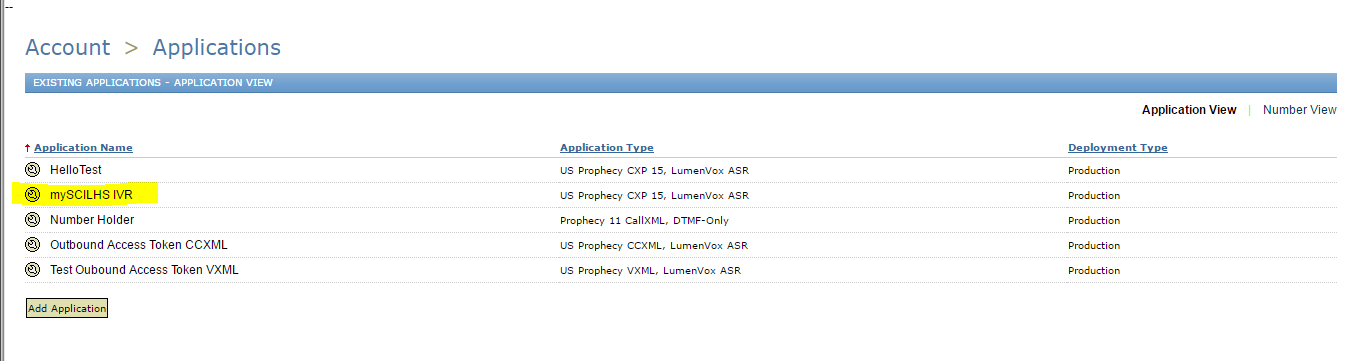
- On the applications page, you should now see your newly-deployed application among the list, like below:
...
d. If this is the first time deploying an application, you will need to migrate your assigned phone number to your application. Please perform the following:
Click on the ‘Number Holder’ application;
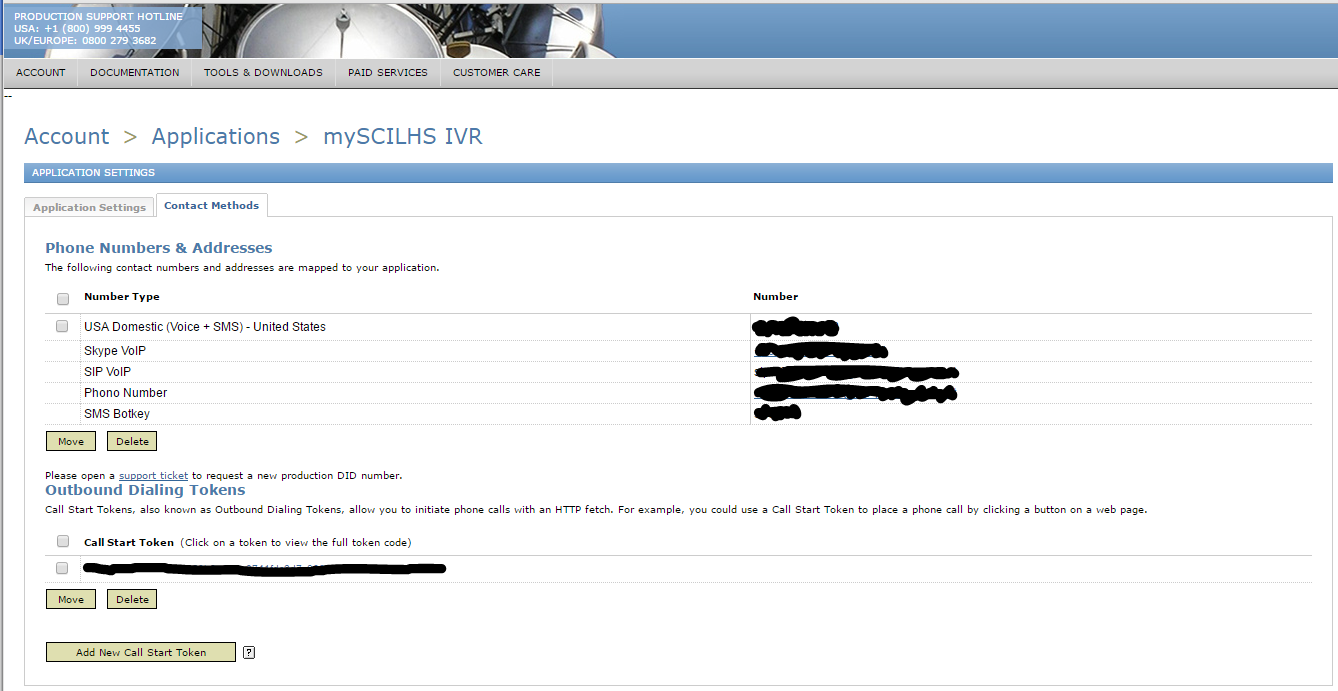
In the application’s details window, select the ‘Contact Methods’ tab;
- Under ‘Phone Numbers and Addresses’ click the box next to the phone number you were assigned;
...
vi. Verify the contact methods made it over. Switch to your IVR application entry and view the Contact Methods.
Step 9: Test the application
Using a phone, dial your assigned number;
If successful, you should hear a simple message informing you that the IVR application has been successfully deployed.
...
Step 10: Congratulations! As new studies and production surveys become available, there will be a similar procedure to upload these IVR application and application updates.